How to Repair a Gate Valve – Gate valves are straightforward valves that, unlike most others, do not rely on rubber gaskets to seal. Instead, they employ metal guides and a “gate” to stop and start the flow. Operation is straightforward and smooth thanks to the multi-turn handle. However, knowing how to replace a gate valve may be useful from time to time.
On Linquip, you can find anything you want to know about gate valves. Whenever you need a gate valve, our experts can help you to find the right one for your application. For a basic understanding of these industrial devices, you might want to read Linquip’s article, “What is a Gate Valve? Working Principle and Function.“
Do you have any experience with them? Choose from Linquip’s selection of Gate Valve Products to find the valve you need. Is there a particular service you require for your gate valve? Did you ever find yourself in a situation where you needed an installation guide or a guide on the maintenance and repair of a gate valve? Our platform allows FREE access to all Gate Valve Service Providers on Linquip, and we are confident that you will be pleased. As an additional benefit, if you wish to find out the prices of gate valves, you can do so by submitting a request/inquiry for a free quote to all Gate Valve Suppliers and Companies via the Linquip platform.
Gate valve problems are uncommon, but the most typical one is when something gets caught in the valve’s body’s guides on the sides or bottom. When a gate valve is left open for an extended length of time, this can happen. Blocked gate channels might prevent the valve from fully closing.
But don’t worry, a minor obstruction does not indicate the valve is damaged. If their passage is hindered, gate valves are simple to disassemble and clean. A gate valve can also be easily rebuilt. After addressing cleaning and disassembly, we’ll go over how to rebuild a gate valve.
⇒ View a List of Gate Valves for Sale and Their Suppliers ⇐
How to Disassemble Gate Valves
Gate valves are usually fastened to a wall or between two pipe sections. You can try to clear the valve with merely the water in the system before removing it. Turn on the water as high as it will go, then carefully open and close the valve as far as it will go. This may dislodge some debris, allowing you to fully close the gate valve.
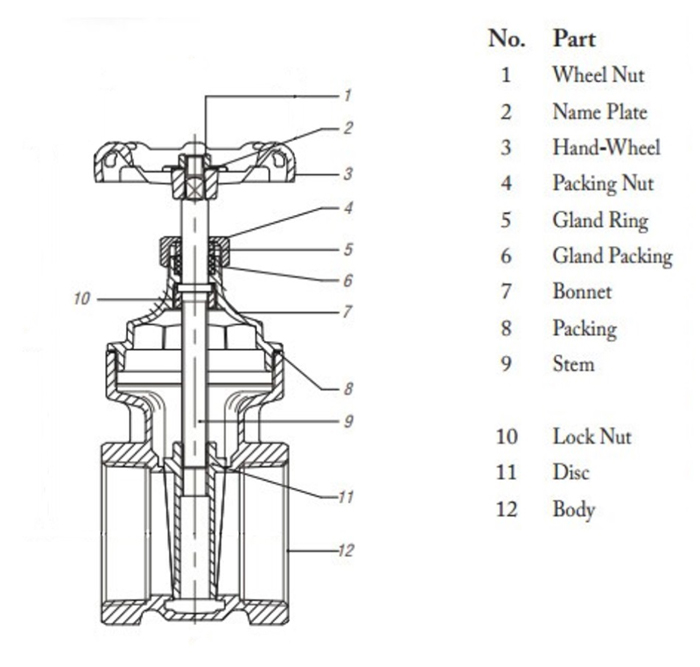
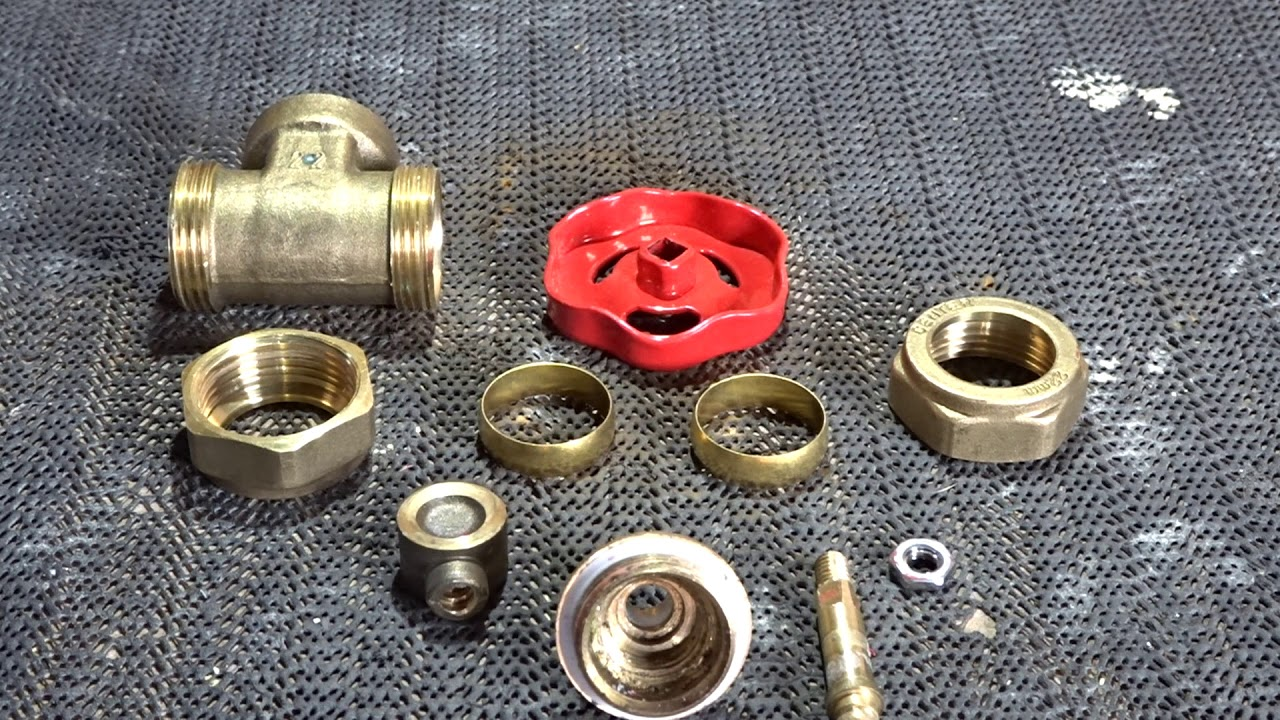
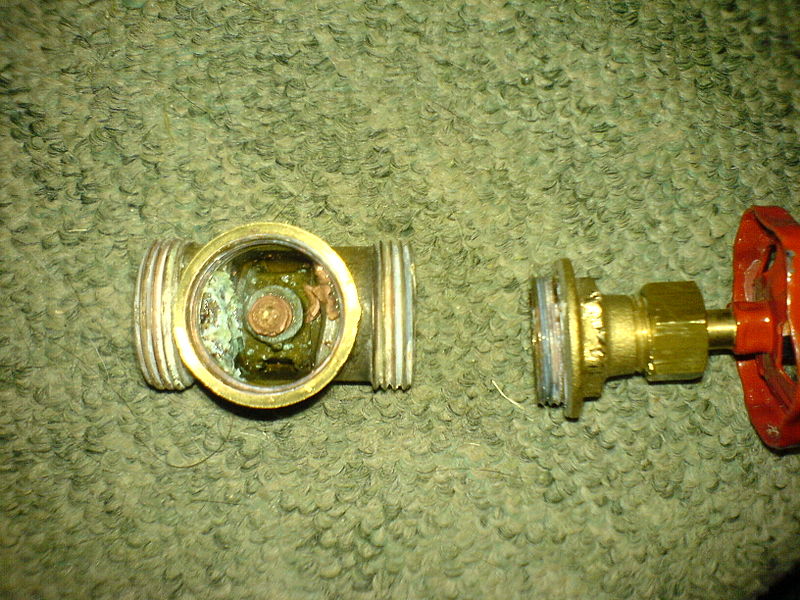
If this doesn’t work, cut off the water supply and disconnect the valve from the pipeline. Typically, this is accomplished by unscrewing the ends. Once the valve is unplugged, remove the gate valve’s bonnet using pliers, as illustrated in the image. The packing nut must not be loosened since it is what keeps the components together and prevents fluid from seeping up the stem.
After unscrewing the bonnet, you may remove the top of the gate valve from the body, including the handle and seats. Cleaning your valve from the top with a toothbrush or other cleaning implement is now possible.

How to Rebuild Gate Valves
Congratulations! Your gate valve is in perfect working condition! It’s now just a matter of putting it all together. If you’ve merely disconnected the bonnet, this is an easy procedure. Return the gate to its normal position in the valve’s body, then tighten the gate valve bonnet. Turn the handle to test the valve. Make sure the gate opens and shuts completely. Replace it in the pipeline using fresh pipe dope or sealant tape once you’ve verified it’s operating properly.
Repairing a broken gate valve is simple, but preventing one is much simpler. Mineral accumulation is the most common source of these issues, therefore, you should thoroughly shut and open your gate valves every few months to eliminate any possible issues. You’ll need to replace your gate valve if it has serious pitting or rust.

Gate Valve Installation & Maintenance Instructions
When properly fitted and maintained, gate valves of various materials and seat kinds are simple to use and endure a long time. For different end connections (e.g., flanged vs. rolling groove vs. Victaulic), the installation procedure differs significantly, but the other directions stay the same.
Storage Requirements
- Do not package the valves until they are ready for installation to protect the seat and seals. This will shield the valve from dust and debris, which may cause seat leaking in the future.
- If kept for an extended amount of time, keep it cool and properly aired.
Installation of Valve
- Valves can be set in any position although it is preferable to install them upright, especially in larger sizes, for easier access to the handwheel.
- Before installing the gate valve, check the material of the seat and disc. Make sure there aren’t any problems with storage or transit.
- Complete all welding before installing the valve, and make sure the flange has reached room temperature before fitting the gate valve with the proper gasket.
- Before installing the pipe, inspect it for welding residue, waste, rust, pickle paste, or other debris. If necessary, wash with water or a light detergent.
- Make sure that the flange is not warped or the gate valve is not misaligned with respect to it. When the valve is not properly aligned with the flange/pipe, this is the most prevalent cause of valve difficulties. To lessen the stress on the pipe assembly, support the valve as needed.
- Install the spacing bolts with care to avoid damaging the valve seat, and position the face to face of the two flanges so that room is available when the pipe is stretched open (enough space to slip the valve in or out for service).
- Insert the bolts such that the bottom of the valve rests on them to prevent the valve from falling through after the pipes are centered.
- Tighten the bolts one at a time, in phases, to provide consistent pressure and a seal between the valve, gasket, and flanges.
- Once the installation is complete, test the valve by operating it several times to confirm it has not shifted throughout the process.
Field Trials
- Gate valves with a rubber seat are only meant to hold rated pressures. In the closed position, test pressures over the rated operating pressure can harm the valve.
- The pipeline can be tested up to the valve hydrostatic test pressure with the valve in the open position.
- Foreign material jammed between the seat and the body might cause the seat to leak. If this happens, open the valve 10% to 15% to get a high-velocity flushing action. If required, close and repeat.
Operation
- Use the valve only at pressures below the operating pressure.
- Check the valve face and seat if the valve is stuck halfway between open and closed. Remove any strange things and inspect them (see maintenance).
- Actuators with too much torque might harm internal valve components.

Maintenance
- If the valve isn’t used frequently, cycle it at least once a month.
- Before doing any maintenance, lower the system pressure.
- Reverse the installation procedure to remove the piping (above).
- Remove the top body (bonnet) and stem from the valve gate and replace it.
- Remove the gate and replace it with a new one. Refit the top of the body into place.
Product Benefits and Design Advice
- Always consider the available space for handwheel operation while sizing the valve.
- To bear extra weight, consider using valve supports.
- On request, 316 stainless steel extension shafts are available.
- This will allow the valve to be installed in a pit and operated above ground.
- The bodies of these valves are made of Ductile Iron for additional robustness. Low torque operation and a long maintenance-free operating life are provided by high-finish molded seats.
For more information about how to repair a gate valve, watch this video.
What Causes A Gate Valve To Malfunction?
Gate valve failure is often caused by corrosion and wear. Over time, gate valves become old and worn. A disc can also become stuck open or closed due to corrosion. Typically, the stem that connects the handle to the disc breaks when the handle is forced, rendering the valve ineffective.
FAQs about Gate Valves
1. Can A Gate Valve Be Rebuilt?
Repairing a broken gate valve is simple, but preventing one is much simpler. Mineral accumulation is the most common source of these issues, therefore you should thoroughly shut and open your gate valves every few months to eliminate any possible issues.
2. How Do You Seal A Leaking Gate Valve?
Turn off the water at the leaky water valve first. Then loosen and detach the packing nut after removing the handle from the stem. Replace the old washer with the new one. Reattach the handle and tighten the packing nut softly with a wrench (don’t over tighten at this or any other point).
3. How Do You Fix A Leaking Outdoor Water Valve?
When the water is turned on, tighten the packing nut behind the handle 1/8 to 1/4 turn if the spigot is leaking around the valve stem. If the leak persists after tightening the packing nut, replace the washer at the valve stem’s end.
Download How to Repair Gate Valves PDF
The PDF version of this article can be downloaded by clicking on the link provided below.
Buy Equipment or Ask for a Service
By using Linquip RFQ Service, you can expect to receive quotations from various suppliers across multiple industries and regions.
Click Here to Request a Quotation From Suppliers and Service Providers
Read More In Linquip
- Gate Valves: What is a Gate Valve? Working Principle & Function
- Gate Valve Installation Costs and Maintenance (Clear Guide)
- Main Parts of Gate Valve: Practical Guide
- Gate Valve vs Butterfly Valve: Comprehensive Guide
- Gate Valve vs Ball Valve – How They Work?
- Difference Between Gate Valve and Globe Valve
- How to Replace a Sink Shut-off Valve? A Comprehensive Guide


Very insightful blog.
Thanks for visiting our website and leaving your comment, Neel! You are encouraged to visit Linquip Tech News, where you can find similar posts.
I have a gate that broke in the closed position, do I need to remove the packing nut first
Thanks for visiting our website, Ron! You can visit our Industrial Equipment page, where you can find various gate valves based on your application and demand. You can also visit our expert page and take advice from hundreds of professionals on your issue.