How to Use a Laser Level – Laser levels are one of the most innovative tools to hit the construction industry since the power drill. The laser level, which is now a common item in the tool belts of most contractors, first appeared in the late 1960s to early 1970s and underwent several changes over the years before being patented and improved upon in the 1980s and 1990s.
The first laser levels in use required the user to manually alter the tool’s location in order for the standard bubble levels to read level because they were not self-leveling. Once the gadget was in place, the laser line it produced might be regarded as being absolutely level. Later, especially in interior construction, self-leveling lasers gained popularity as an alternative. Using this choice, the user could position the laser, and an automatic level line would be produced.
On the Linquip website, among the many options available to you, you will find all the information you need to know about the Laser Levels, as well as information regarding this marketplace. You can count on Linquip to provide you with as much general and reliable information about this topic, whether you’re a professional or a customer looking for a proper company. We recommend you review a list of all Laser Levels Products available in Linquip. You can also be encouraged to visit Laser Levels for Sale and find the most suitable device based on your applications and demands.
How a Laser Level Works
A laser level projects one or more fixed lines or dots down a horizontal and/or vertical axis using a laser, which is “a device that creates light through a technique of optical amplification based on the stimulation of electromagnetic radiation.” Using these lines or dots as a guide, you may align your work to produce perfectly straight and exact results. Lines and dots are combined in certain laser levels.

What is a Laser Level Used For?
In situations where a straight and level reference point is required over a broader surface, laser levels are frequently utilized. They resemble a sort of visual chalk line. Employ them for professional leveling applications such as mounting picture frames, installing dado rails, and other tasks requiring precise point transfer.
There are several indoor and outdoor uses for laser levels. Many are compatible with tripods or are shipped with one. In professional applications, a laser tripod will provide the laser with better stability and support, ensuring that you consistently get the most precise results.
We advise you to think about getting a laser level that “self-levels.” These models provide the highest level of accuracy while being the simplest to use. They are perfect for a variety of plumbing and leveling operations.
Self-leveling lasers effortlessly establish and keep a level within a predetermined range. With manual leveling lasers, the user must manually adjust the unit’s level by rotating the thumb screws and checking the bubble vials.
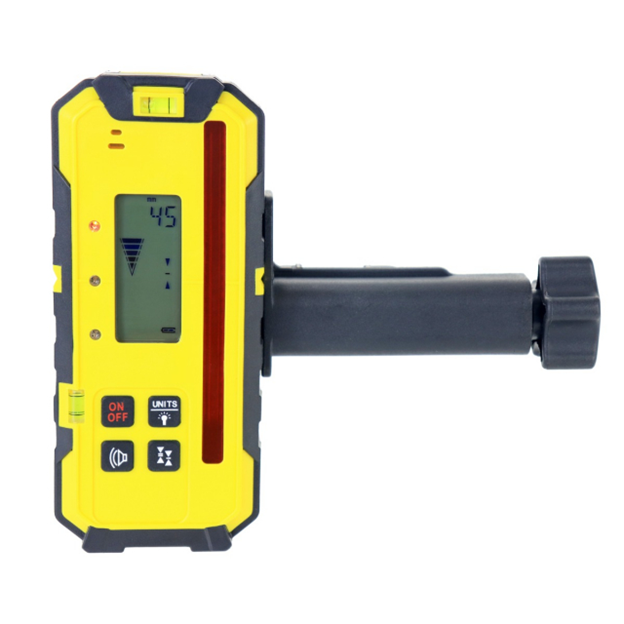
A laser detector is another option (sometimes called a laser receiver). You will want a laser detector if you intend to use your laser level outside. In conditions where a laser beam isn’t visible to the human eye, such as in broad daylight, they assist you in finding it.
Parts of a Laser Level
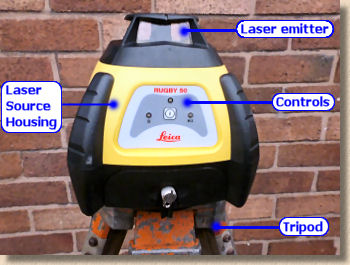
Only a few basic parts make up a typical line laser level. A typical laser will include an on/off switch and a button to select whether it will cast a horizontal or vertical laser line, or both at once. The bottom of the laser level often has a 1/4-inch female fitting for attachment to a common camera tripod. Some lasers also come with magnets for installation on metal beams, studs, or even corner beads.
The tool has a swinging laser on the inside. This is what enables it to level on its own. To protect the delicate parts, certain versions may have a mechanism that locks the laser in position when not in use. Last but not least, the device will have a power supply. This will most likely be an AA battery compartment or a slot for a rechargeable lithium battery.
Only the chosen beams and the mounting mechanism will change when utilizing a laser level in various applications. You will occasionally require merely a horizontal beam, occasionally a vertical beam, and occasionally both. Your use case and workplace will determine which mounting device is the best solution. The magnetic mount works well with metal studs; installing suspended ceilings works well with clip mounts; and the majority of other activities require a tripod mount.

Various Types of Laser Levels
A prism is used by a cross line laser to redirect the laser about 180 degrees, either vertically, horizontally, or both. A rotating laser rapidly rotates the light beam to simulate a 360-degree horizontal or vertical plane.
How to Use a Line Laser Level
These procedures, which may be used for the majority of instances where a line laser would be helpful, show how to install upper cabinets using a line laser level.
Measure The Wall And Mark It
Find the height on the wall where the cabinets will sit and mark it before you even turn on your laser level. Its height will typically be 54 inches off the ground. The advantage of using a laser level is that it can measure this height only once and transmit it across the space.
Install Your Laser Level
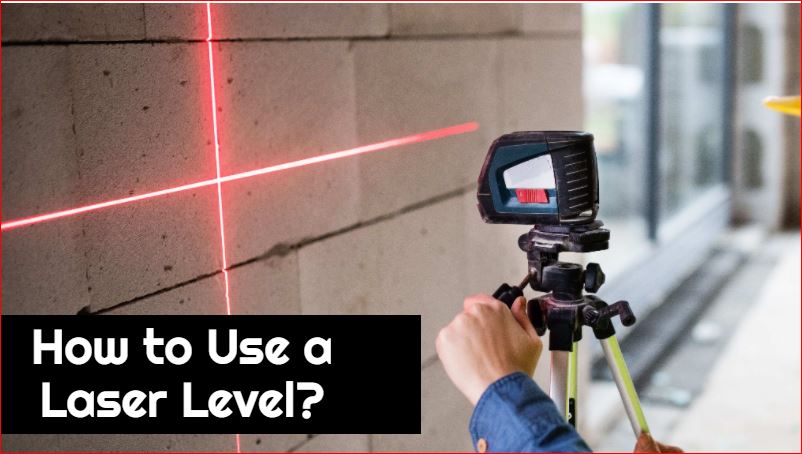
The ideal method to utilize your laser level in this situation is mounted on a tripod (although this may vary depending on your specific scenario). This will make positioning and adjusting simple. Using the 1/4-inch female fitting that is supplied, screw the laser to the tripod.
Place the Tripod
Set your workstation across from your tripod on a somewhat flat surface. Your lasers’ precision won’t have any problems in a typical area, but in very big rooms, try to keep the laser no closer than 40 to 50 feet from the working wall.
Place the laser in a corner facing both walls if you’re working on two walls and require the same level line across each of them. If positioned in the middle of the space, some lasers can even span three walls.
Turn on the Laser
When the line is in the right place on the wall where you marked it with a marker, turn on the laser, choose the horizontal beam, and adjust the tripod.
Install Cabinets
Just put your cabinets in place after lowering the bottom of each cabinet until it sits on the laser line. For a completely straight row of upper cabinets, continue with the remaining cabinets.
What Is A Laser Detector?
The difficulty of seeing the lines and dots in bright illumination, such as outdoors, is a drawback of using a laser level. This issue is solved by a laser detector, sometimes referred to as a “laser receiver,” which enables you to view and operate your laser in outside applications.
Laser detectors are not as straightforward as you would assume; they merely identify the laser line that is invisible to the unaided eye. To ensure a level reading, the laser detector instructs the operator to raise or lower the laser on an aluminum rod. Around the level point, the frequency of the audio alarm rises.
When purchasing a detector for your laser, keep the following factors in mind if yours doesn’t already come standard with your purchase of the laser:
- For a laser detector to detect line lasers, it must be in “pulse mode.”
- Line laser receivers cannot be used with rotary lasers.
- Due to the different frequencies of red and green lasers, certain detectors will only function with these colors. To determine if this is the case, be sure to consult the model’s product specification.

How to Choose a Laser Level
- Undertaking inside? In a tiny, contained space, several line lasers are useful for framing images or aligning kitchen cabinets. For tile and masonry work, use a laser square.
- Outdoor undertaking long distances and uneven surfaces are well-suited for rotary and line lasers with a pulse detector function.
- Think about the laser’s travel distance or the size of the room. Low-revolutions-per-minute (RPM) laser levels are bright and visible, but they don’t move very far. while the laser is fainter and travels farther at high RPM values.
- Consider the style of the wall. Suction cups or pins are used to attach laser levels. Avoid using push-pin laser levels on wallpaper or paneling.
- Determine the job’s stability. For interior work, a manual laser level is an option. For outdoor work involving uneven terrain, you will need a self-leveling laser level.
Buying a Laser Level versus Renting One
Should you purchase a laser level for the task at hand or just rent one? The solution, however, depends on your demands. Get your own if all you require is a regular line laser and you want to use it more than once. Even if you believe you’ll use it just once, you’ll probably find many other applications for it later. Moreover, line lasers are accessible to most people and reasonably priced.
If you want to obtain an A+ on your patio installation and need a rotary laser, you might think about renting one. Since rotary levels are much more expensive, the average homeowner is not likely to find enough uses for them to make it worth it to buy them.
How to Maintain an Accurately Functioning Laser Level
Self-leveling laser levels require little maintenance to remain accurate and functional. Handling your laser carefully and storing it in a protective case when not in use are the best things you can do to extend its lifespan. Despite the fact that modern lasers are made to withstand the rigors of a construction site, they are still very delicate instruments and need to be handled carefully. A dip might also affect how accurate your laser is. If you utilize the laser despite not realizing it, you run the risk of doing subpar work that will cost you considerably more than buying a new laser.
Replacement Time for Your Laser Level
When should I replace my laser level? The obvious response is when it breaks. If it is obviously incapable of completing the work at hand, it is time for a new one. Yet, occasionally, laser levels malfunction in less obvious ways that have an impact on the performance without your knowledge. Because of this, you should routinely check the laser level’s accuracy against a traditional level and/or plumb line. If your laser can be calibrated, do it as directed by the manufacturer or send it in for calibration.
FAQs about How to Use Laser Level
- What are 2 things you should do before you use a laser level?
A suitable battery must be connected to a laser level in accordance with the user manual before you may use it. Next, decide where to put the laser level tripod and make sure the ground is dry so it doesn’t move out of place.
- How do you use a laser level for floors?
To see lines on the ceiling and floor, simply point the laser where you want the wall to be. You have two options: either you leave the laser in place and build in accordance with its lines, or you mark the top and bottom wall plates using the lines. In any case, using a laser is quicker and simpler.
- Is it worth buying a laser level?
Laser levels are useful for both professional and do-it-yourself projects. They are more than precise enough for the majority of applications, and the setup time and consistency can expedite a protracted process.
Conclusion
You may acquire all the details you want about the Laser Levels and details about this market on the Linquip website, one of the numerous possibilities available to you. Whether you’re a professional or a client seeking for a reputable business, you can rely on Linquip to give you as much basic and trustworthy information on this subject. We advise you to look through the whole range of Laser Level Experts and take advice from our professionals. If you need any services required for your product, you can count on Linquip and visit Laser Level Services.
Download PDF for How to Use a Laser Level?
You can download the PDF format of this post from the link provided here.
Buy Equipment or Ask for a Service
By using Linquip RFQ Service, you can expect to receive quotations from various suppliers across multiple industries and regions.
Click Here to Request a Quotation From Suppliers and Service Providers
Read More on Linquip


